
Regardless of your cooking skills, one thing is clear: being able to prepare chicken breast will always be a valuable skill to have. Whether you make it the main focus of your meal,summer barbecue menuor simply serve it with rice and vegetables (my favorite, especially since I’ve finally learned)how to cook ricecorrectly, it ensures a quick and dependable meal – but only if you understand how to prepare it properly for tender, yet crunchy outcomes.
The main thing, it appears, lies in the preparation—and identifying which approach suits you best. Whether cooking a chicken breast in an air fryer or the oven, I sought advice from professionals on their preferred tips and methods for preparing chicken breast.
1. Steps for baking chicken breast in the oven
To keep your chicken breast as moist as possible, you should allocate time for preparation before placing it in the oven.
Tolong support kita ya,
Cukup klik ini aja: https://indonesiacrowd.com/support-bonus/
“A chicken breast is a lean, mild cut of meat: it’s a great versatile option for cooking when handled properly, but it can be tough if overcooked,” says the chef and food blogger.Dennis Littley. ‘I always start by drying the breast and gently tapping (try theOXO Good Grips meat mallet from Amazon) spread it to an even thickness of approximately one to one-and-a-half centimeters. This helps it cook uniformly, resulting in a delicious golden crust without a dry middle.
Place your chicken breasts on a baking sheet lined with parchment paper or foil, then pour some olive oil over them. ‘If I feel like keeping it simple, just roasting in the oven is perfect,’ says Dennis. ‘You can start with high heat to get crispy edges, or use a lower temperature for a more delicate result.’
For the slower approach, you should plan for approximately 30 minutes of cooking time at a temperature ranging from 350 to 400°F; if you’re looking for something quick and crispy, you can bake it at 450°F for as few as 15 minutes. I personally like a middle ground – and according to the bestselling cookbook author,Clare AndrewsI bake at 390°F for 18 to 20 minutes,” she says. “Using foil for the first half of the cooking time helps retain moisture.
You’ll be able to tell the chicken breast is done when the juices are clear (however, it’s a good idea to use a meat thermometer for confirmation; the internal temperature should be no less than 165°F, according to FDA recommendations).
2. How to prepare chicken breast using an air fryer
After ultimately deciding on thebest air fryer, I’m eager to utilize mine effectively – and I enjoy air frying chicken breast for a quick weeknight dinner.
Once you’re prepared to begin, there’s no requirement to preheat your air fryer; simply adjust it to a temperature of approximately 375-400°F. “Air frying chicken breast is my preferred technique,” notes Clare. “I prepare it at 390°F for about 15 minutes, turning it halfway through. This results in a crispy outer layer and a moist interior, without causing it to become dry.”
Wrapping the meat in aluminum foil can help keep it moist, but this step is less important when using an air fryer. That said, placing foil in the air fryer basket can capture drippings and simplify the cleaning process.
4. Steps to prepare chicken breast on the stovetop
The traditional searing technique is a well-established way to prepare chicken breast and is certainly a faster approach.
“Brown over medium-high heat for 5 to 6 minutes on each side; cover the pan during the last few minutes to retain moisture,” suggests Clare.
You can also place your chicken breast in the oven for a short time after cooking it in a pan. “On the stove, a medium-high sear creates that nice crust, and then I finish it in the oven at 390°F,” says Dennis.
5. Steps for grilling chicken breast
With barbecue season upon us, grilling chicken breasts is an excellent choice for summer gatherings. Start by heating your grill (or a skillet if you prefer not to cook directly on the grates), then flatten and season your chicken (and marinate it if possible). Cover and cook until grill marks form – this usually takes about 5 minutes per side.
To retain moisture and enhance flavor, I prefer to either brine or marinate my chicken first. “Brining is an excellent method for adding moisture and taste to chicken breast, regardless of the cooking method; just 30 minutes in a saltwater mixture can make a big difference,” explains Clare. “Alternatively, a basic marinade consisting of olive oil, lemon juice, garlic, and herbs adds flavor and helps soften the meat.”
Try using our home-smoked seasoning for added taste and texture
5. How to cook chicken breast by poaching
To achieve the highest level of moisture, poaching chicken breast is the optimal method. “When I desire a silky, hassle-free chicken dish, I poach it in gently simmering seasoned water for 10 to 20 minutes,” explains Dennis. “Starting with cold liquid helps ensure the meat remains tender and fully infused with flavor.” Once cooled, this makes a wonderful component in aCaesar salad.
Our recommended items for preparing chicken breast
 Best buy
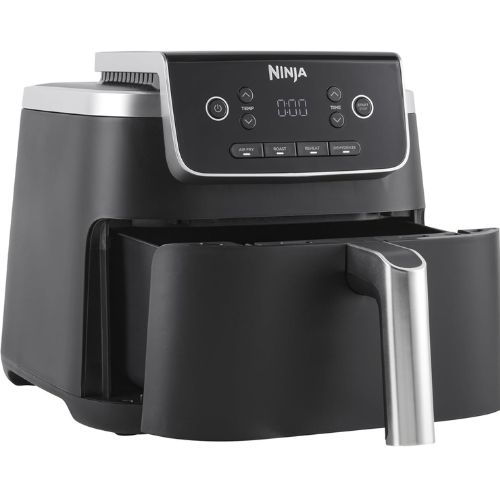
If you’re assessing thebest non-toxic air fryers, the Ninja Air Fryer Pro 4-in-1 is our top recommendation. It features a PFAS-free ceramic-coated crisper tray and a spacious 5-quart basket capable of holding up to 4 pounds of food – and it’s guaranteed to cook delicious chicken in a short amount of time.
 Fast reading
This fast-cleaning, water-resistant thermometer delivers a temperature reading in less than 4 seconds. My favorite aspect, though? The 180° automatic rotating screen – perfect for left-handed individuals.
 Induction ready
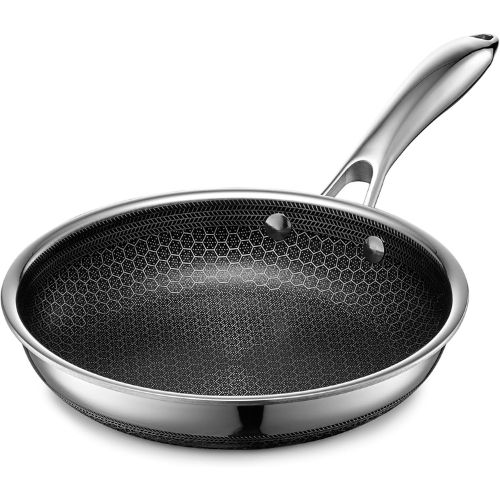
Grilling chicken breasts has never been simpler with this amazing tool; in fact, it passed our test with flying colors.HexClad cookware review.Non-hazardous, suitable for dishwashers, and works with every type of cooktop, it’s an ideal tool for your stovetop collection (though it can also be used in the oven).
FAQs
Is it recommended to let chicken sit after it’s cooked?
If you’re questioning whether to allow the chicken to rest after cooking, the response is a clear and definite yes. I was unaware of just how significantly this step can enhance the taste and consistency of the chicken, but it truly makes a remarkable difference.
Always let your chicken rest for 5 minutes following cooking,” Clare stresses. “This helps the juices spread evenly, avoiding dryness. When you’re prepared to serve, cut across the grain for a more tender texture.
What distinguishes chicken breast from chicken thighs?
The primary distinction between chicken breast and chicken thighs lies in their fat levels.
“Chicken breast is less fatty compared to other parts such as thighs, which are more tender because of their higher fat level,” says Clare.
I also enjoy cooking thighs: their richness makes them ideal for grilling or slow-cooking,” says Dennis. “However, if you’re looking for a lean, adaptable protein that highlights skilled preparation, that’s when the breast really stands out.
What can be paired with a chicken breast?
If you’re wondering what to pair with chicken breast, there are numerous possibilities. Clare recommends adding slices to wraps andsummer salads, or serving whole with creamy mashed potatoes, while Dennis suggests roasted seasonal vegetables orgrainssimilar to risotto and polenta, featuring lively sauces like ‘chimichurri, gremolata, or a creamy mustard mixture’.
Now that I have a wealth of knowledge, I can’t wait to experiment with more chicken recipes;Ina Garten’s ideal roasted chicken recipeis next in my list.
Liked this article? To discover more stories like this, follow us on MSN by clicking the +Follow button located at the top of this page.


